Showing posts with label Taped. Show all posts

Negative Space Nail Art!...

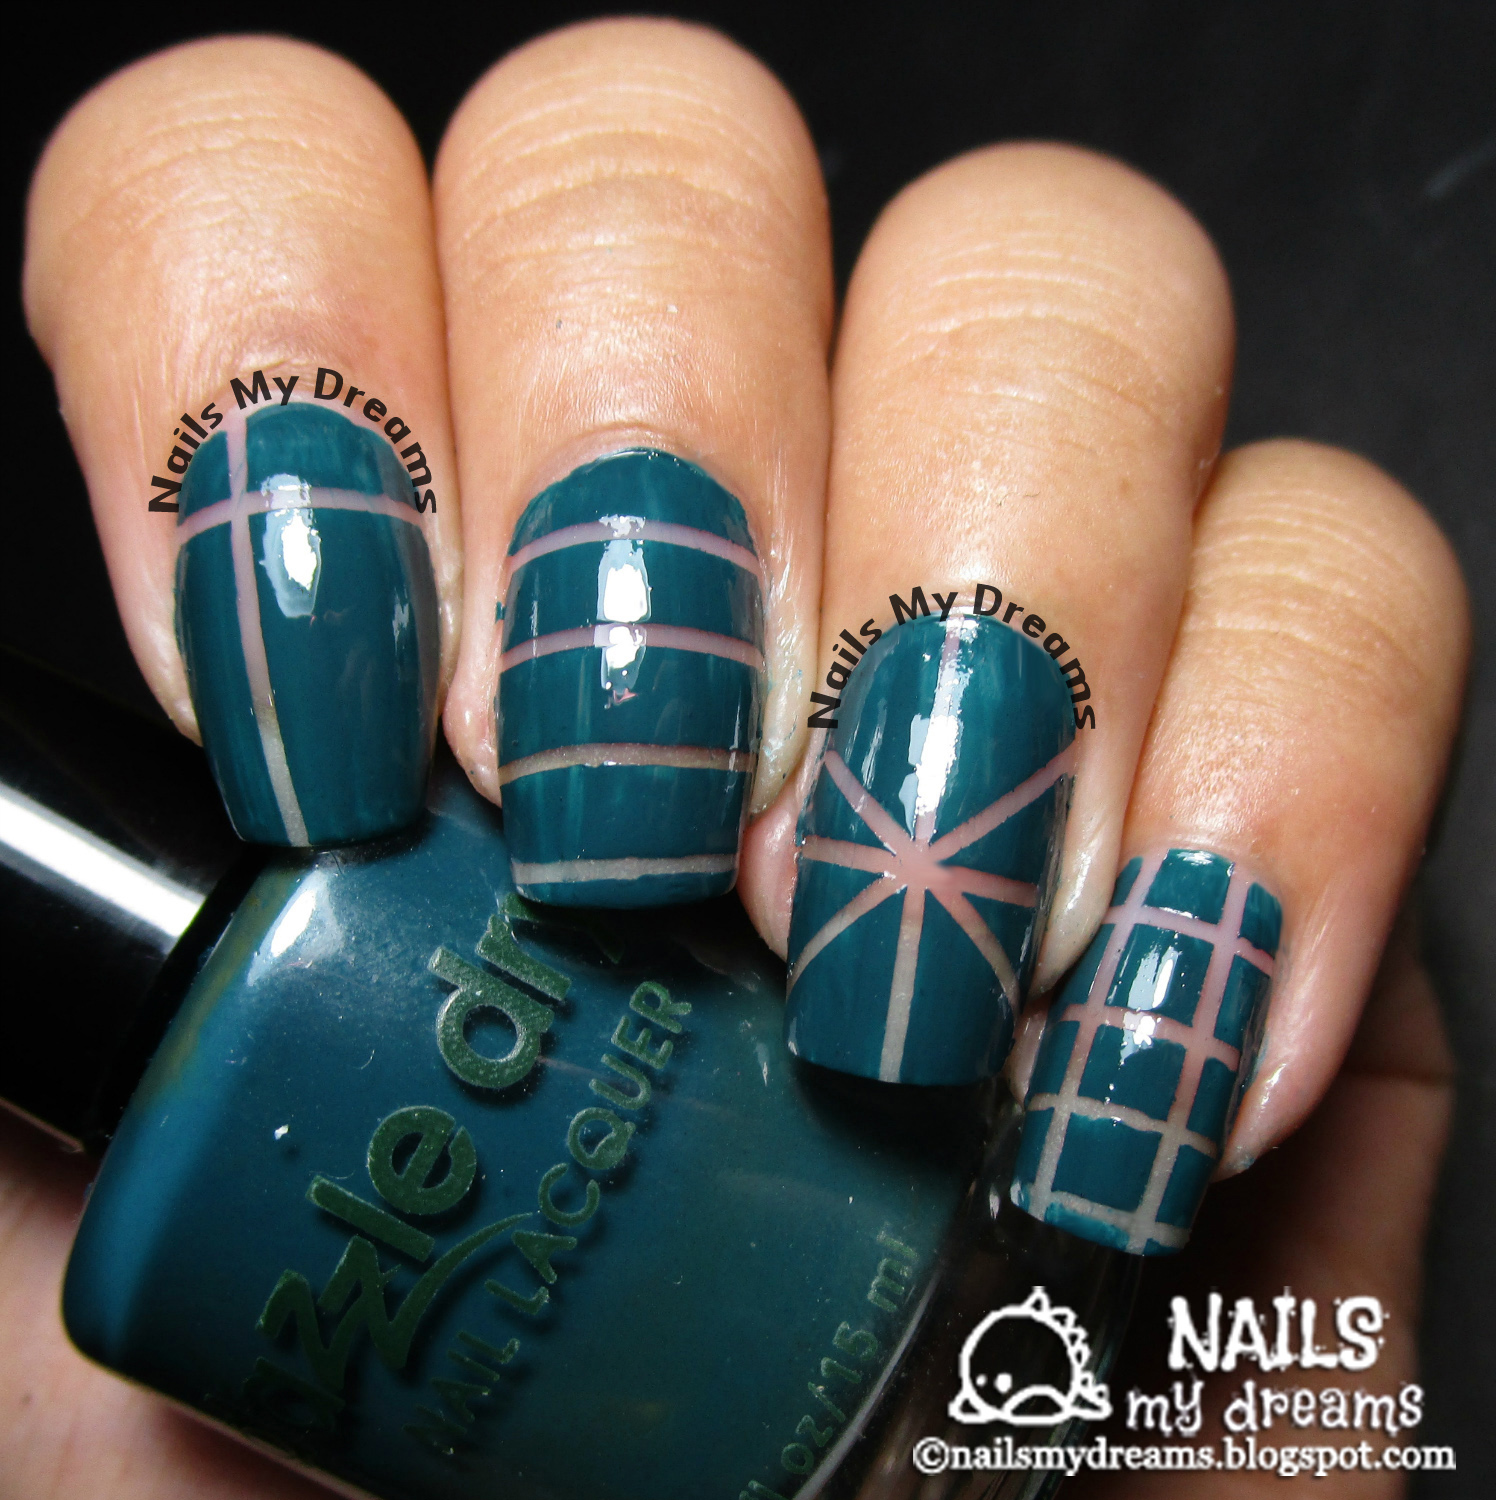
negative space nail art dazzle dry
NAIL POLISH USED:
DAZZLE DRY Mythic Teal

NAIL ART STUFF USED:
Striping Tape


Hi everyone! While I was browsing around the internet, I stumbled upon this cool negative space nail art tutorial and I knew I had to try doing it immediately. And so, my very first negative space nail art was born. Woohoo~
(^o^)

Blue Gradient Matte Nails?...

NAIL POLISHES USED:

CHIC Silky White
CHIC Bluebell Grape
COLOR TRENDS Papa Paparazzi
BOBBIE Matte Top Coat

Hi! A week ago, a reader e-mailed me and requested for a simple design using a matte top coat and the color blue. I immediately thought of this nail art I did a looong time ago and decided to recreate it in blue this time. But, due to laziness (and craziness), I skipped using the french tip guides or tapes and decided to just wing it using the brush from the nail polish itself. lol.
(^^,)

Candy Corn Nails?...

Hi! The next theme from the Halloween Nail Art Challenge I'm participating in is "corn candy". 
(^_^) 
Now, I really, really tried to draw candy corns (I practiced a lot on fake nails). However, my execution was a little... awry. I used OMG's Banana Boat, Bobbie's Salmon and Caronia's White Satin. I also taped the sides diagonally to help make it more candy corn-ish. Hmmm. The ones on my middle finger and ring finger look okay but the others are... not. 
(>_<)
Still, I gave it my best shot. I guess I should just stop practicing like crazy and start winging it like I did in the other challenges. Hihi. Anyway, I hope you all had a wonderful day. Good night and I'll see you again tomorrow!
(^^,)

Pink Gradient Nails!...

Hi! I would like to show you this simple gradient nail design I did an hour ago. I made layers with the help of french tip guides (I ran out of tape). I used Chic's Frosty Rose, The Face Shop's PP402 and Chic's Black Velvet. I then applied a matte top coat to blend the colors a little more. 
(^^,)
I hope you like it. I really have to finish something tonight so I need to say goodbye now. I'll see you again tomorrow!
\(^o^)/

Lightning Bolt Nails!...

Hi! We had a huge thunderstorm last last night and I'm still feeling a wee bit traumatized. You see, I was driving when this lightning bolt lit up the sky and kept on doing it for five minutes straight. It was a good thing I was already inside our subdivision because I swerved a little (okay, a lot) when that happened. *shudders* Who knows what accident I would've been in otherwise.... Anyway, that sorta inspired me to do a lightning bolt manicure. 
(=_=)
I had a really hard time doing this one. *coughs* As some of you may notice, the lightning bolts on my forefinger and pinky are just... wrong... Hihi. I tried to draw them using a nail art brush but I guess I failed. I used tapes while doing the other three but I got tired of cutting them up, hence the two disasters. I also tried to shake things up a bit by reversing the colors for my ring finger and thumbnail but I don't really like the overall effect. *sighs*
(~_~)
Still, all of them looked good from a distance so that made me very happy. lol. Well, that's it for now. Happy weekend everyone! Good night and see you again tomorrow!
(^o^)

P.S. I used Bobbie's Pina Colada for the yellow parts and Chic's Black Velvet for the black parts.

Layered Nails!...

Layered Nails! (or gradient nails). Bwahahahaha. I really looooooove my nails today! They're soooo coooool. Hahaha.
(^^,)
Anyway, I used tape in making this. It took me almost three hours because I wanted to make sure that the layers are really dry before I apply the next one. I used three different grainy or sandy nail polishes in making this. The first one is Chic's Shadow Crystal (see my post about it here). The second one is U&A #8012 and the last one is Blue Place's dark gray one. I'll post about the last two again separately later. I hope you like it and i'll see you again tomorrow! Goodbye!
(^_^)

Oooohhhh gold!...

Tadaaaa! Oops. Sorry for the blurry picture. I don't know why but my camera just won't focus so I can get a good shot of my nails. 
(-.-)
Anyway, I was rummaging around my nail polish bin for inspiration when I stumbled upon this cool gold Chanel decal and some tape. I did the gold inverted V first using the tape (very very easy to do). I then placed the logo on my ring finger. I originally planned to put one on each of my fingers but when I only counted 10 of them, I immediately changed my mind. I wanted to save them for future nail art attempts. Kekeke.
(^^,)
As I was rummaging, I also noticed that I don't have any black or white nail polish at all (they're like basic necessities when doing nail art)! Gyaaaa! I really need to list everything I have somewhere. 
(o.O)
Now, I really hope you like my design. I'm currently searching for nail art inspirations and I think I may do a Tetris Battle-inspired one soon. Oh, I also bought a tripod. I think I will post about how I apply my nail polish sooner. Kekeke. Stay tuned! 
(^-^)